Dashboard
Getting started
This section will guide you through every necessary step to create, launch and analyse the survey your mobile app needs!
Step 1: Get familiar with the dashboard
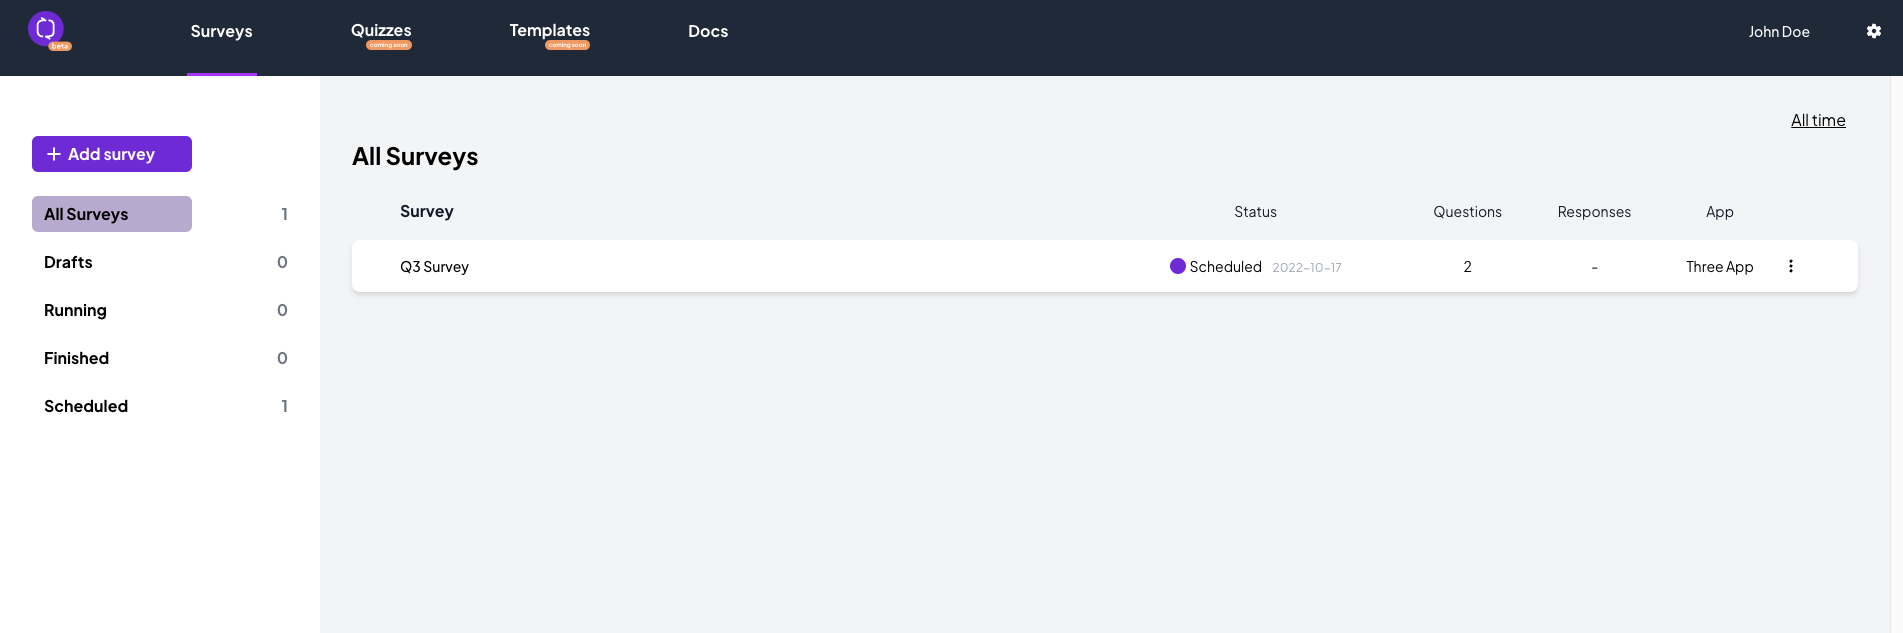
Once you log in to your profile you will see the Survey Listings dashboard home page.
The navigation on the left gives you the possibility to create a new survey while indicating the status of previous ones you have created.
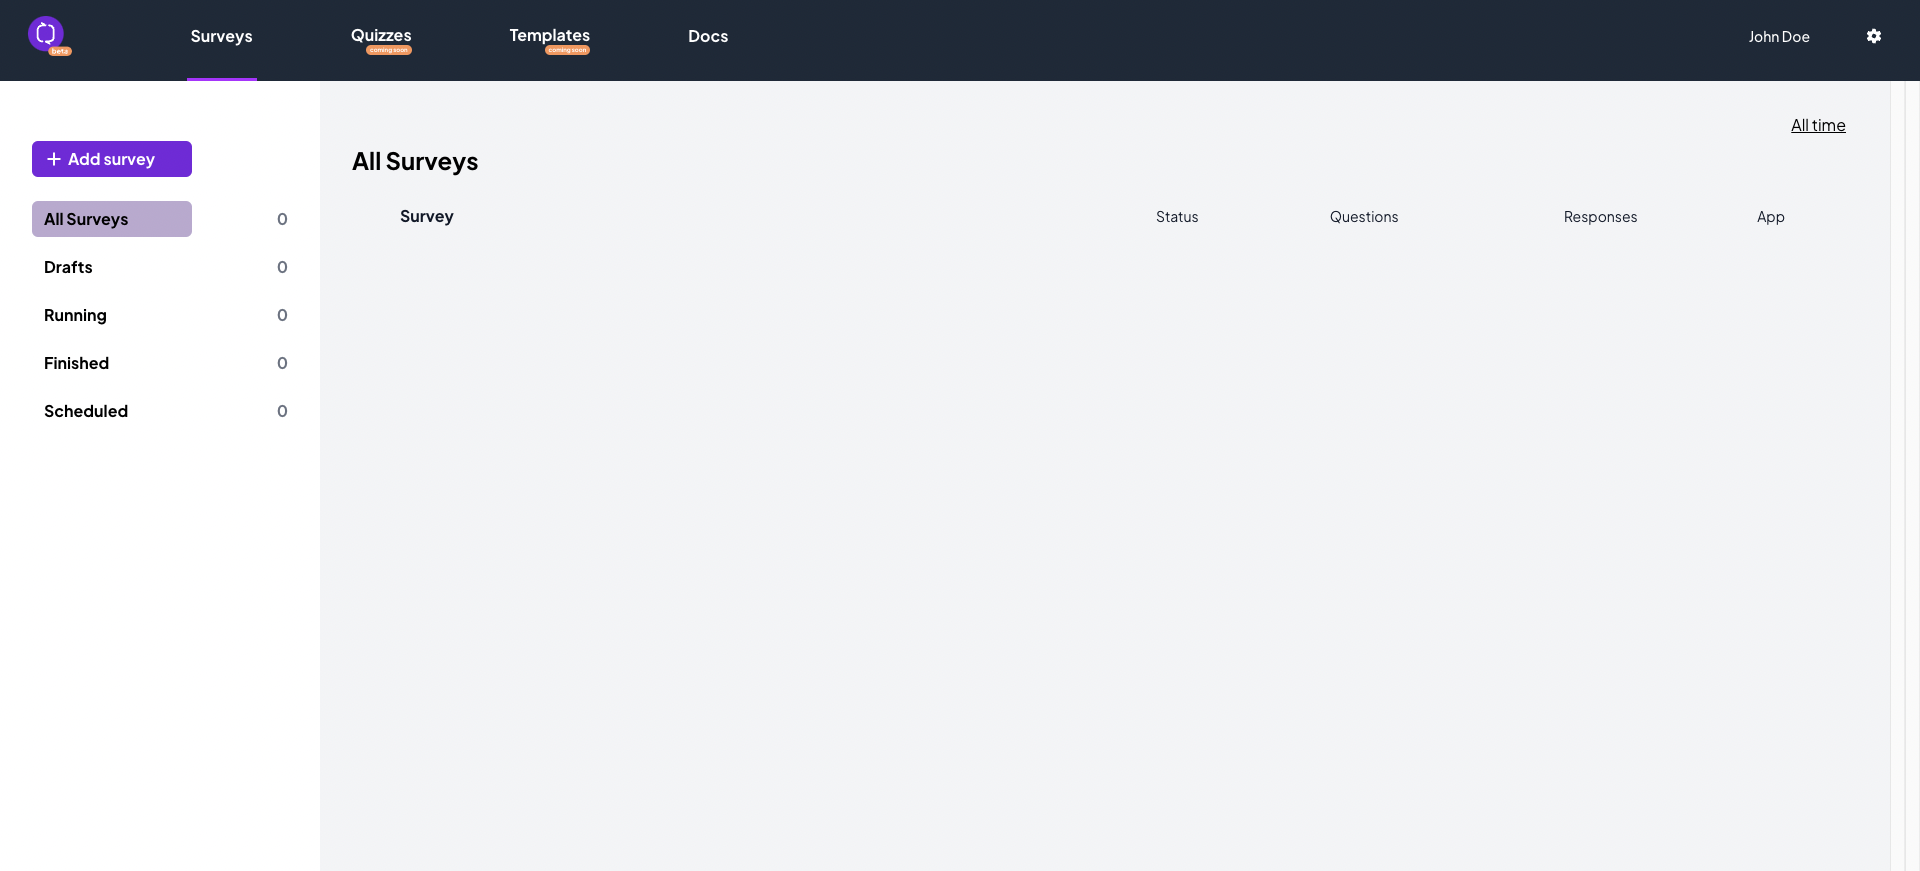
MobSur currently supports surveys only, but not for long! We are already planning the MobSur quizzes, polls, templates and other features.
By clicking on the Docs page you will be redirected to our developer-first & developer-friendly documentation our team created with the primary goal of it being so simple that developers of all seniority implement it without a question asked.
Step 2: Create a survey
By clicking on Add survey you will embark on a journey to create your very first mobile app survey.

Navigation on the left:
Type in the name of your survey. Every survey must have a name and at least one question and one answer in order to be eligible to go to Drafts or straight to the Launch page.
Every MobSur survey can have a Welcome and End screen. You can enable or disable this functionality depending on your needs. You can customize the title and subtitle text users will see.
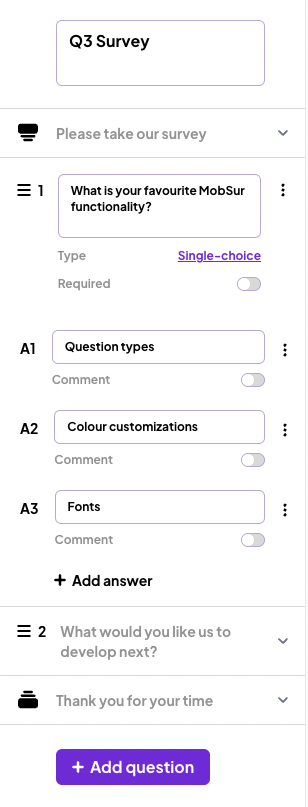
Type in the questions and answers of your survey. You can choose the question type - Single or Multiple-choice; you can enable or disable whether it is required or not.
Enabling the Comment button under an answer will allow users to add something else in addition to the already set survey answer.
The three-dotted menu on the right side of every question/answer allows you to duplicate or delete it easily.
You can easily reorder questions by simply dragging them up or down to where you want them to be.
Navigation on the right:
The right side of the Create page offers you the visual customizations your survey needs.
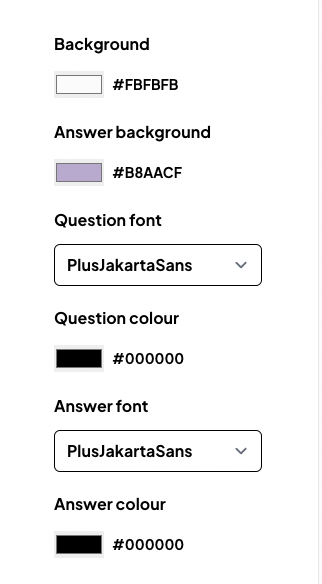
You can easily pick the background screen colour, title, subtitle question and answer text colours, fonts and background.
Make your MobSur surveys truly yours!
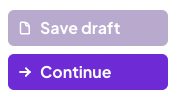
Want to make changes to the survey later - no worries, save it to drafts.
Don’t want to stop your inspiration there - save and continue to the Launch page.
Step 3: Launch survey
You have by now created the visual part of your survey. The Launch page gives you now the possibility to set other equally important aspects.
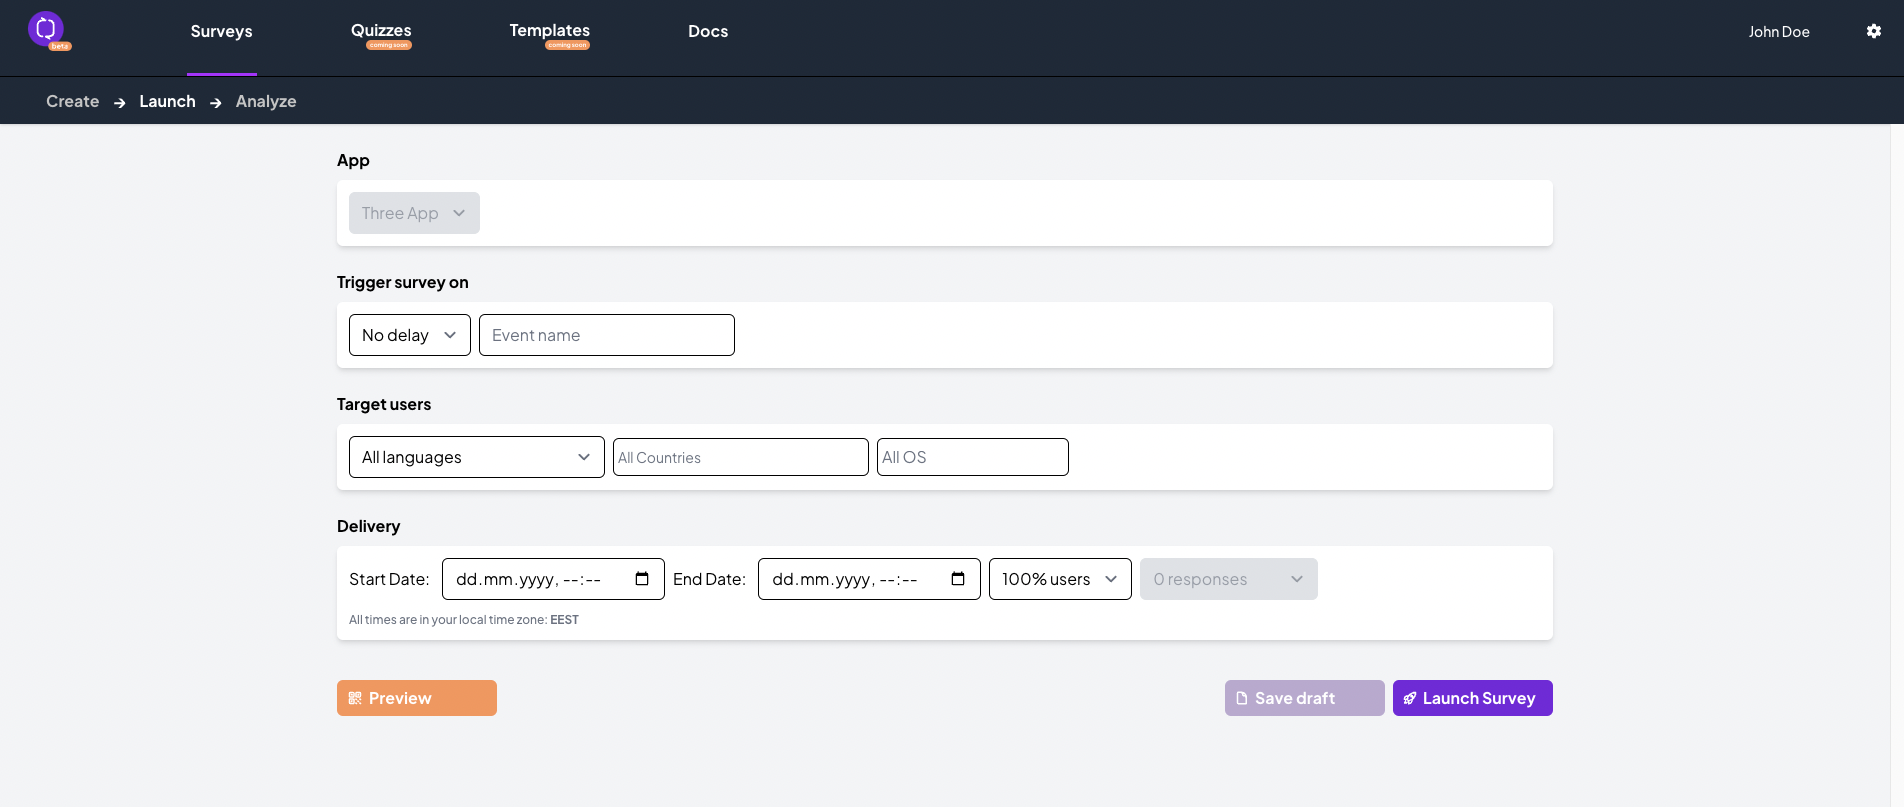
Choose when and on which event to trigger your survey. Note that currently there should be only ONE event indicated in the field!
You can target users everywhere, in every language and on different operating systems - iOS & Android. Simply choose and add the relevant ones from the Target users fields.
As with everything else - timing is of essence. Set up the exact start and end times.
You can target a different percent of the eligible users for that survey (depending on the event you have chosen, amount of eligible users might differ).
By clicking on the Preview button,
a QR code will be generated on your screen. Download the MobSur Preview App, open it and scan the QR code to preview the survey you have created and get a hands-on experience on filling it in before your users see it live.
Once you are done with that and are happy with your survey —> Launch it!

The Survey Listings home page will now show you the status and other relevant information regarding your survey.
Step 4: Analyse survey
You have created and launched your survey. Now the ball is in your users’ court. Click on the survey from the Survey Listings home page and immerse yourself in data tailored to your needs.
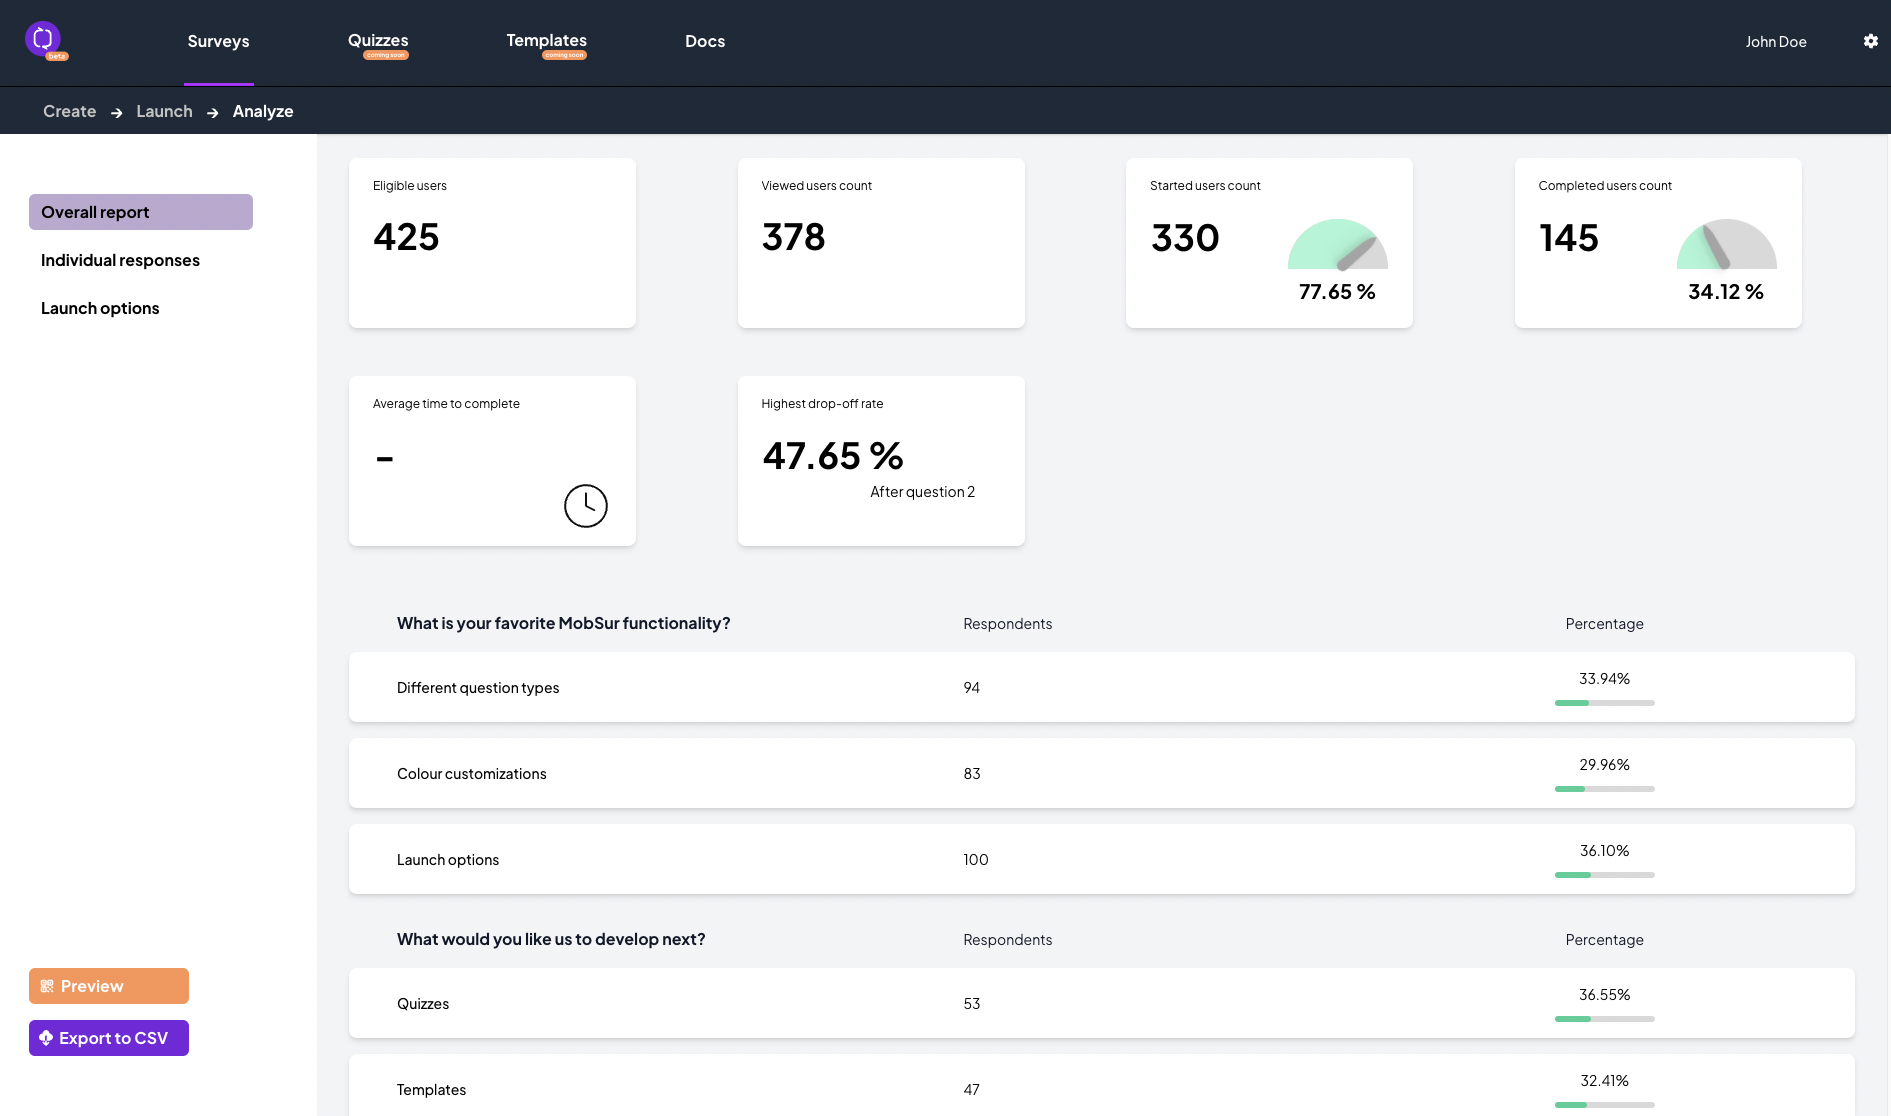
The Overall report page represents the most relevant data and includes various statistics. You can see just how good each question fares in terms of respondents and answer percentages.
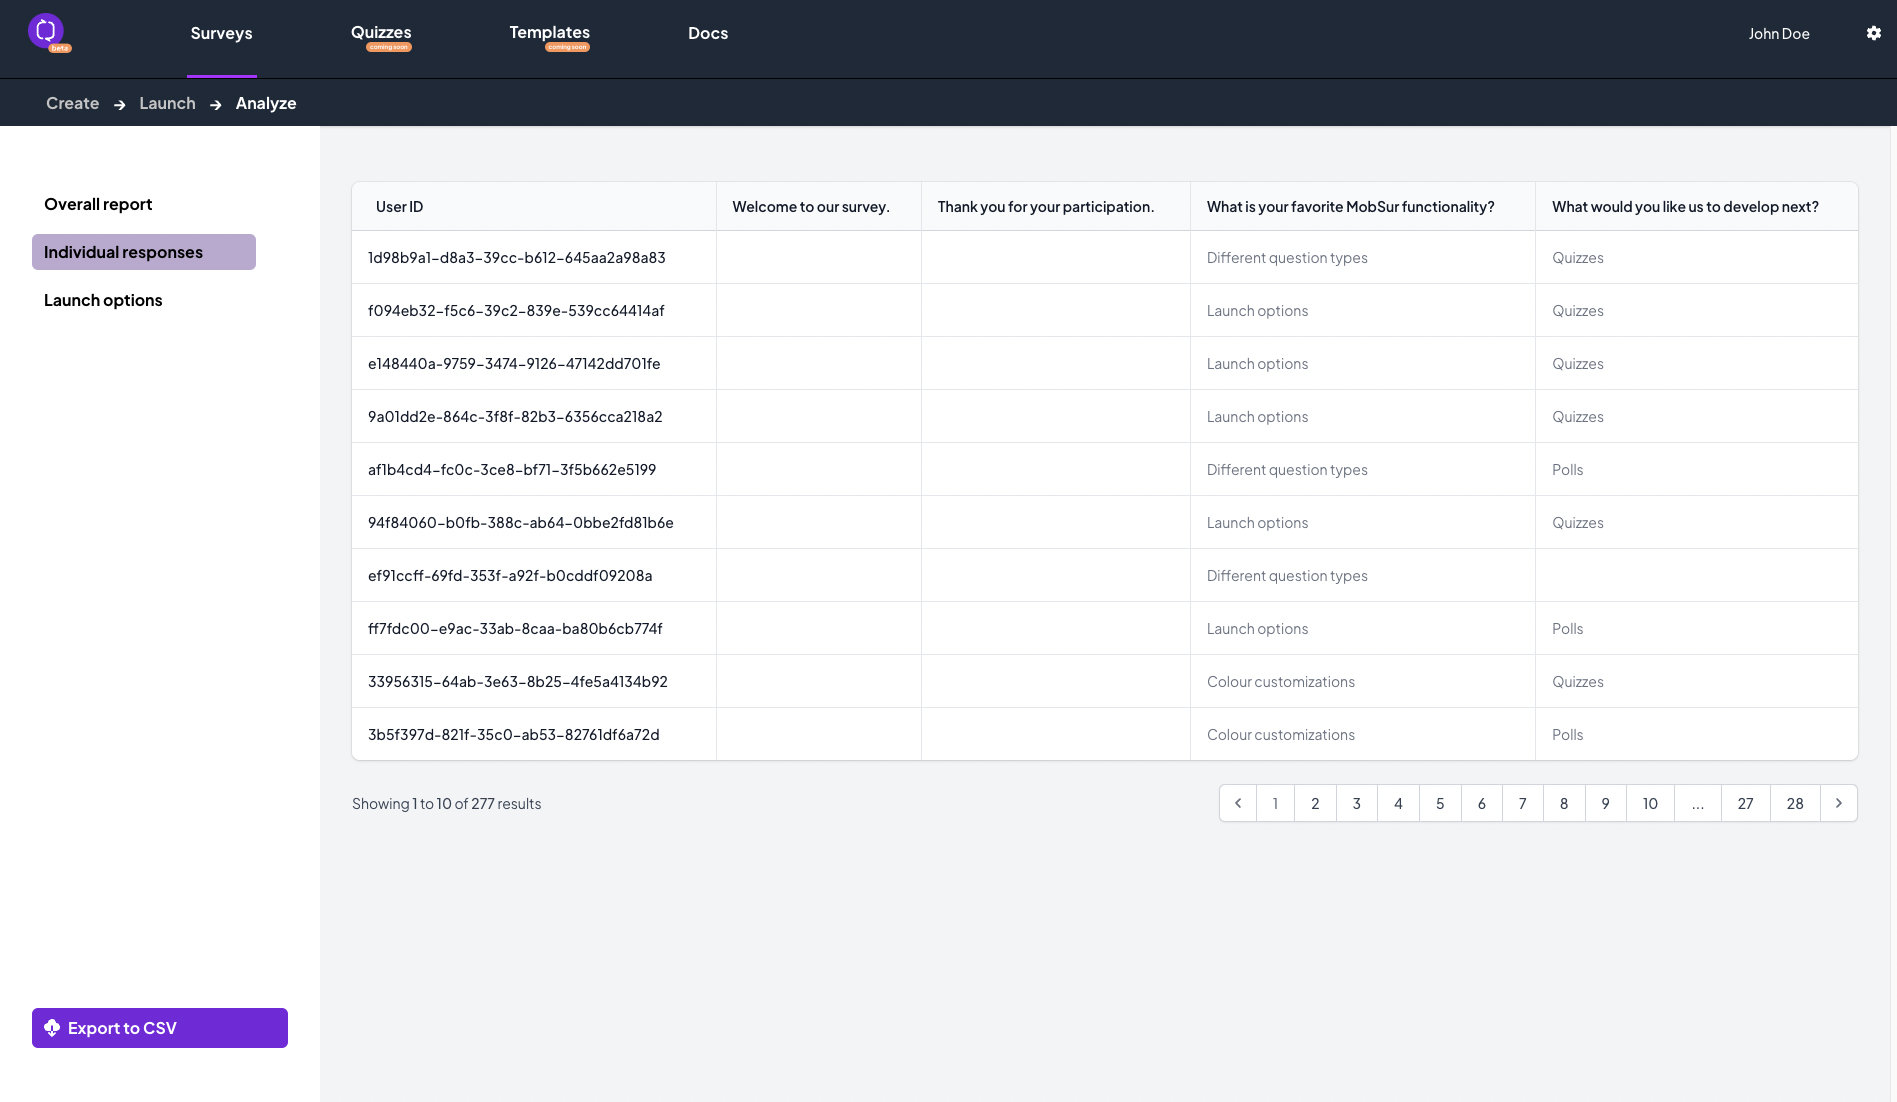
In need of a better picture at the micro level? The Individual responses page gives you a glimpse into the answers of unique users where you can understand better different trends by following the whole journey of respondents.
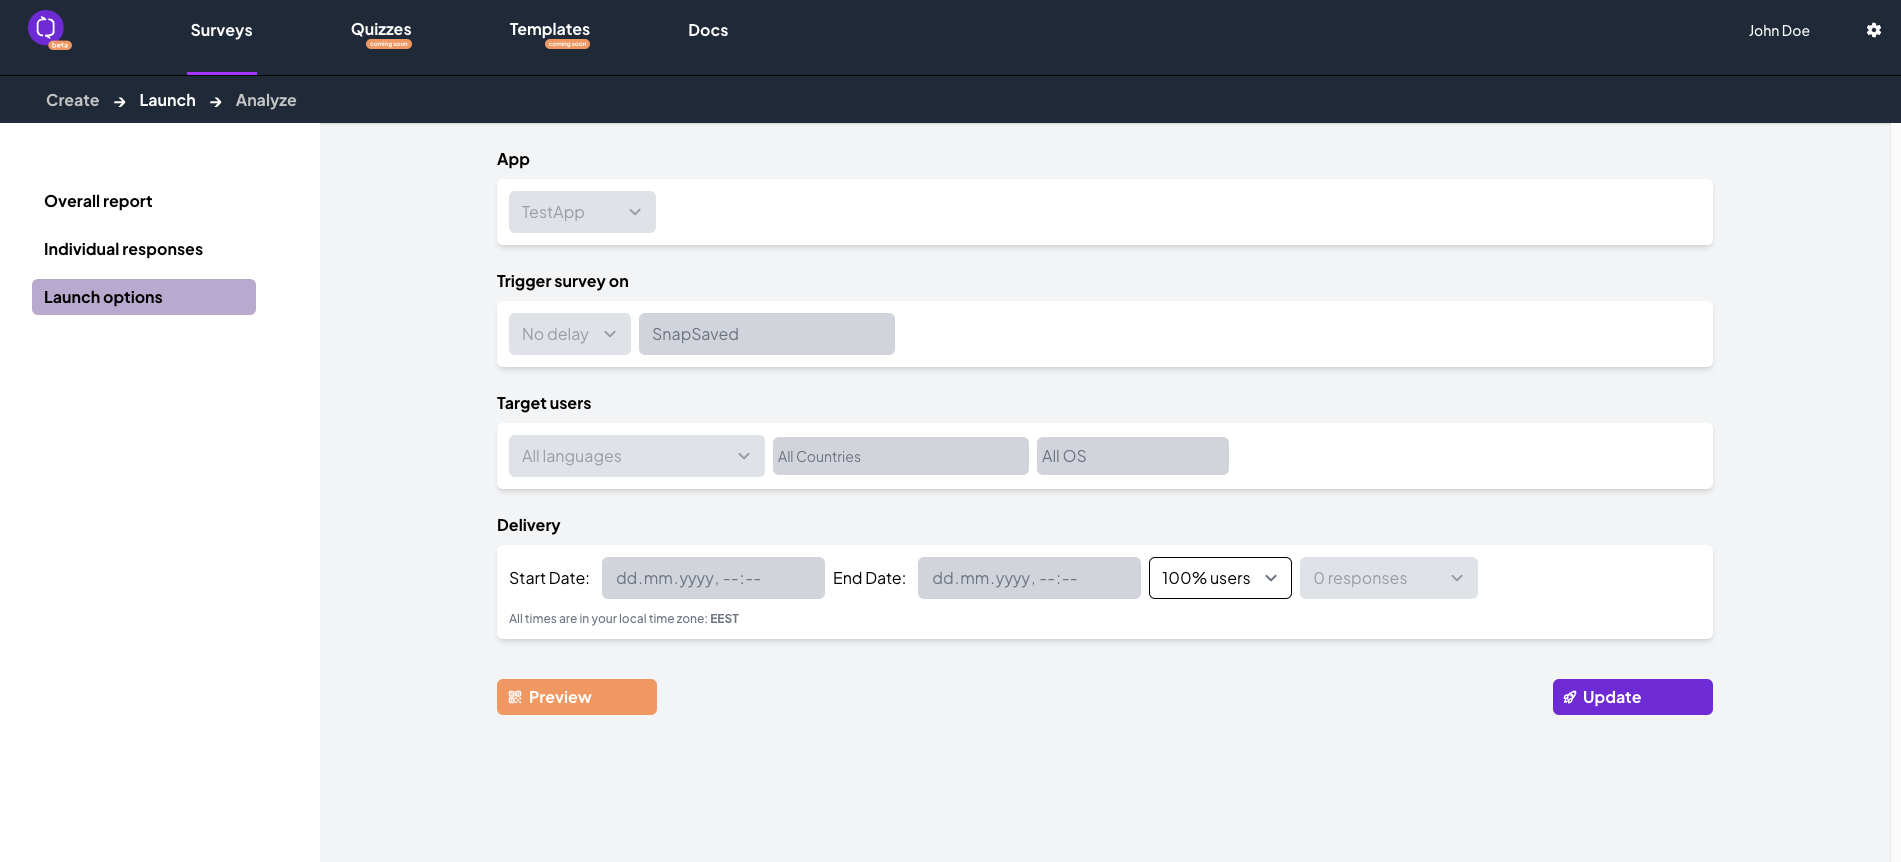
By clicking Launch options you can go and edit some relevant fields depending on your survey’s initial settings. Fields in white are the ones you can update, greyed out ones cannot be edited.
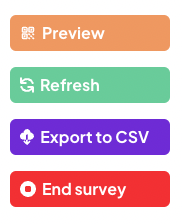
Export the answers of your survey to CSV format, Refresh data to see the latest results or End survey - you can do all that in the Analysis page as well.
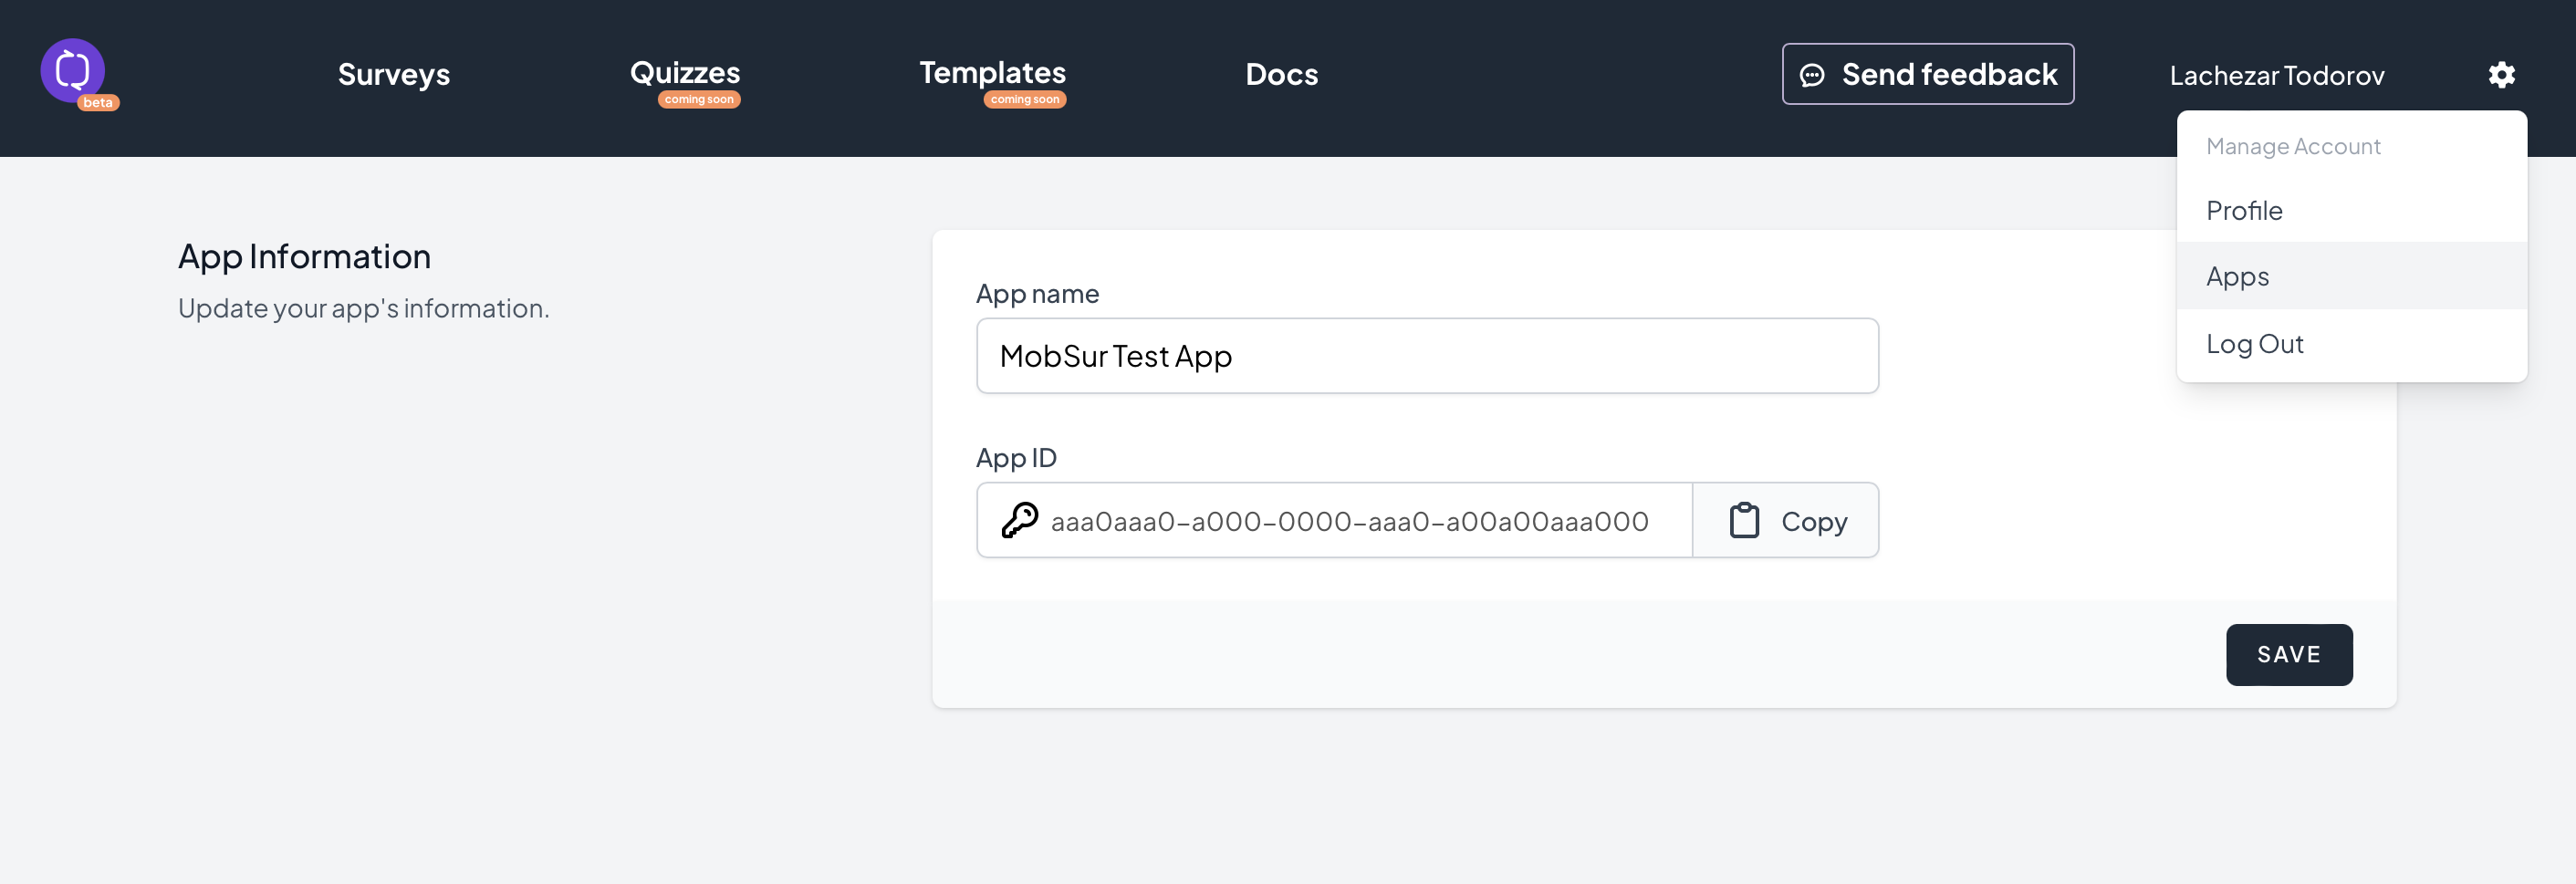
Step 5: Copy App ID and rock on!
By clicking on Apps in Settings you will land in the App Information page where you can copy your unique App ID.
Please check the mobile integration documentation to understand more about how your App ID is important for the integration of any survey.